Hold your mouse over the elements of the user interface to see the bubble help. Click on the element to go to the description.
| Name |
Element |
Description |
| Live |
 |
The Live screen of the MOBOTIX camera displays the current images of the camera.
Use the dropdown menus to access certain functions of the image controls and the camera administration or open the Setup Menu to see links to all image and event control dialogs.
The Admin Menu (password-protected) contains all dialogs for configuring the camera.
|
| Player |
 |
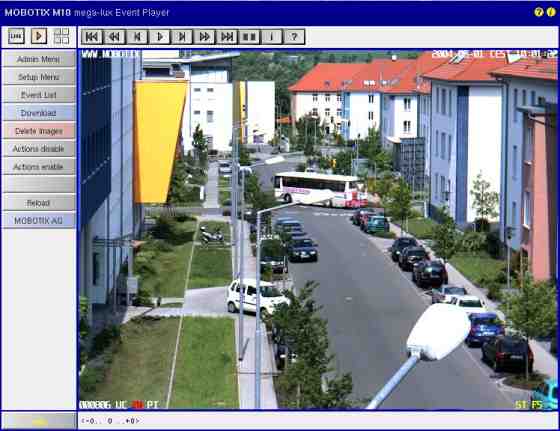
Use the Player screen to view and download the events stored in the internal or the external image storage of the camera.
When you click on  again in the Player and Event Storage on External File Server is activated, the camera displays a list containing the current storage size of the Internal Recorder and of any cameras that are storing their images on the same file server into the same directory. again in the Player and Event Storage on External File Server is activated, the camera displays a list containing the current storage size of the Internal Recorder and of any cameras that are storing their images on the same file server into the same directory.
|
| Multi View |
 |
Use the Multi View screen to combine several cameras in different patterns and to assign special functions (highlighting, focus on alarm, ...) for the individual cameras.
|
| Guest |

|
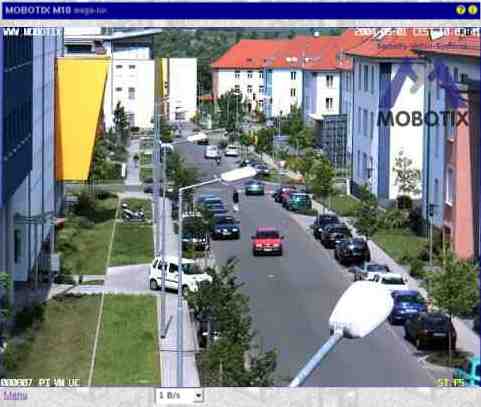
The Guest screen allows viewing the camera's live image, setting the image rate within the preset limits and accessing the Live screen by clicking on the Menu link at the bottom of the page.
|
| PDA |

|
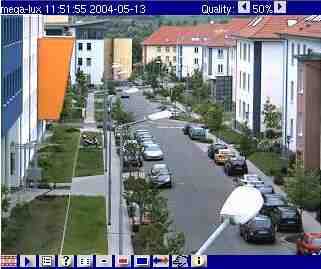
The PDA screen displays the camera's current image for low-resolution devices (PDAs/MDAs and mobile phones).
If you would like to see a list of events on your PDA and download event images, open the PDA Event List.
|
| Name |
Element |
Description |
| First event |

|
Displays the first event that is stored.
|
| Fast rewind |

|
Starts fast rewind from the current image in endless loop mode.
|
| One frame back |

|
Shows the previous event image or the previous image of an event story, depending on the settings of the Event Story button. If the first image has been reached, the next click will show the last image.
|
| Play |

|
Starts playing back the images in endless loop mode. Shows only the event images, all events including event story or one event story only, depending on the settings of the Event Story button.
|
| One frame forward |

|
Shows the next event image or the next image of an event story, depending on the settings of the Event Story button. If the last image has been reached, the next click will show the first image.
|
| Fast forward |

|
Starts fast forward playback in endless loop mode of only the event images, all events including event story or one event story only, depending on the settings of the Event Story button.
|
| Last event |

|
Displays the last event that is stored.
|
| Get image information |

|
Displays the information of the current image.
|
| Open query window |

|
Shows the Event List that allows you to pull up specific events in the camera Player.
Click on the Download Images link in this dialog to download events as described for the Download button.
|
| Stop |

|
Stops an active playback in progress, that had been started using the  , the , the  or the or the  buttons. buttons.
|
The Event Story Button
Click on this button of the Player controls to change the manner in which the Player plays back event stories (i.e. pre-alarm images, the event image itself and the post-alarm images). The Status bar shows, which image of an event story is currently displayed.
In order to change the settings for recording event stories, open the General Event Settings dialog. This dialog will also allow you to specify if you would like to save an event story with every event or only when specific events occur.
| Name |
Element |
Description |
| Image area |
 |
The image area shows the event images of the current camera.
Click into the image to open the information window for the current image.
|
| Text display |
|
Shows the text that had been defined in the Text and Display Settings dialog at the time of the recording.
|
| Date display |
|
Displays the date and time information of the current image.
|
| Event Symbols |
|
Shows the event number (in this case 000807) and the symbols for the activated sensors at the time of the recording. In this image, the UC (User Click), VM (Video Motion) and PI (PIR sensor) had been activated.
Since a video motion window triggered the recording, the VM symbol is shown in red.
|
| Action symbols |
|
This shows the symbols of the actions that had been active at the time of the recording. In this case, REC (Storage) and FS (File Server storage) had been active.
If one of the actions is carried out, it is displayed in blue (e.g. REC in every last image of an event story); a failed action is shown in red (z. B. FS).
|
| Status bar |
|
The Status bar shows, whether or not an event story had been stored for the current event image. In this case, one pre-alarm image (-1) and two post-alarm images (+2) had been stored. The number in the middle (0) shows the current image's position (0 is the event image itself).
|
If you have made adjustments to e.g. the softbuttons (using [Shift]-click) , the camera will keep these changes until the next reboot, but it will not automatically store them permanently. If you have administrative access to the camera, you should store the current configuration into flash memory.


